Last updated: October 30, 2026
Quick Answer
Babyproof a living room without making it look cluttered by securing the biggest hazards first, then using low-profile storage and hidden cord management. The goal is a room that still looks like a room.
In short: babyproof the living room by anchoring the heavy furniture, hiding cords, softening sharp corners, blocking the fireplace, and using closed storage so the room still looks like a room. The cleanest setup starts with the hazards you can see from a crawl-height view, not with a pile of bright plastic add-ons. This article focuses on how to babyproof a living room without making it look cluttered.
Key Takeaways
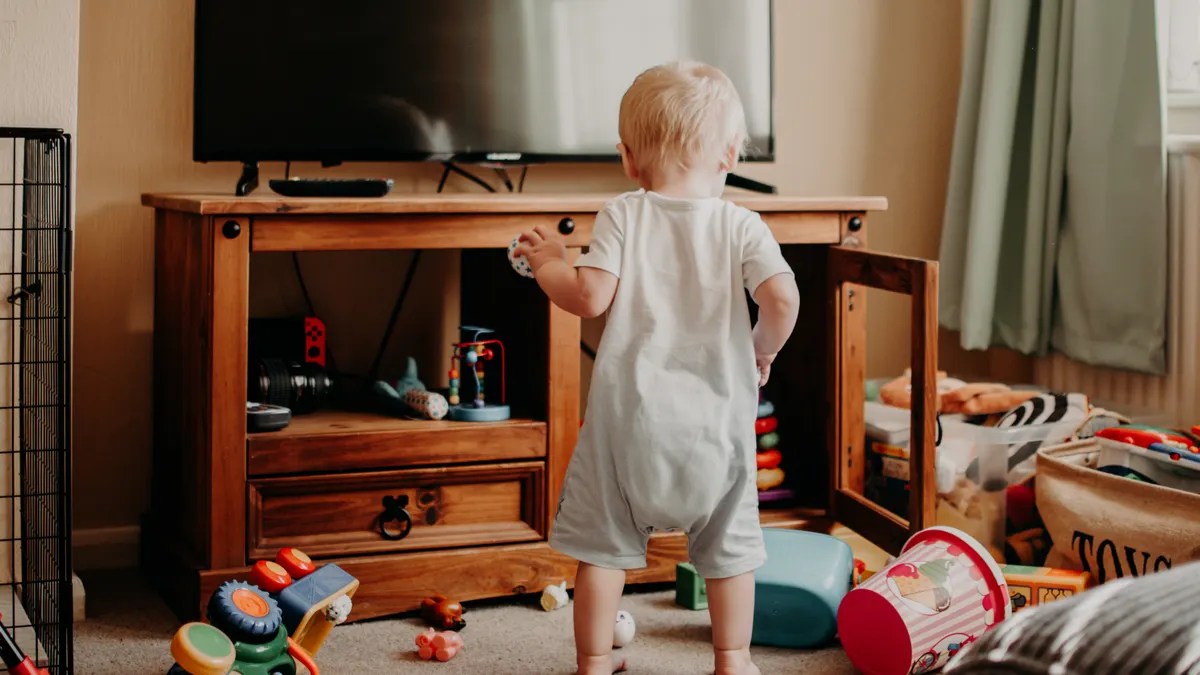
- Start with tip, burn, pinch, and shock risks from a child’s floor-level view.
- Choose low-profile hardware, use existing furniture for storage, and skip bulky add-ons.
- Secure the TV and tip-prone furniture before decorative fixes.
- Route cords, cover outlets, and keep slack out of reach.
If the living room is where the baby plays, naps in a bouncer, or spends time while you fold laundry, it needs a few low-profile fixes that do their job quietly. The trick is choosing hardware and storage that disappear into the room instead of announcing themselves. That means fewer freestanding gates, fewer loose straps, and more pieces that attach to what is already there.
What to fix first in a living room
Start with the things that can tip, burn, pinch, or shock in a room with a child on the floor. In a typical living room, that means the TV, bookcases, dressers, lamps, cords, the fireplace, coffee-table corners, and anything the baby can pull from a shelf in under 30 seconds.
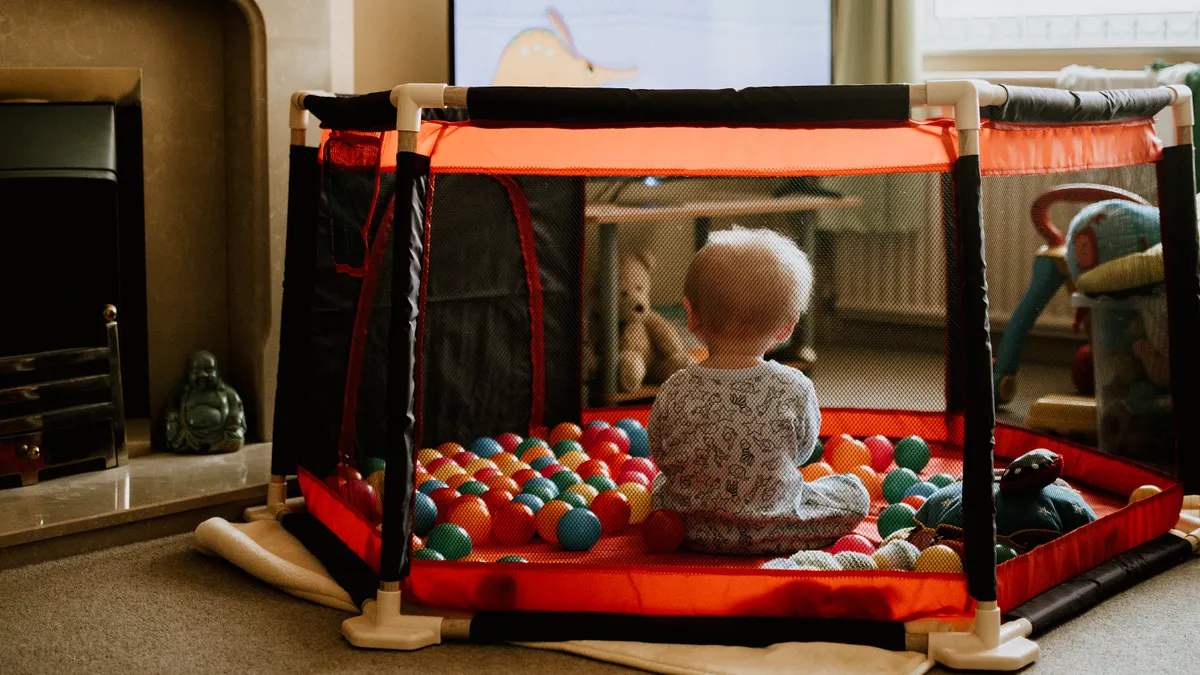
The fastest way to sort the room is often to get down low. Sit on the floor or crouch so your eye line is near 18 inches high. From there, the hazards that disappear at standing height become obvious: dangling power cords, sharp table edges, loose decorative objects, and cords running behind media furniture. If a baby can reach it from a seated crawl, it needs a fix or it needs to move.
Use this order:
- Anchor the biggest tip hazards first. Install tv straps and furniture anchors on any tall or top-heavy piece the baby could pull. When this works, the furniture no longer shifts when you tug the front edge.
- Block heat and flame risks. Put a fireplace gate in place before you worry about decorative items. A proper barrier creates a physical buffer that stays put.
- Cover sharp edges. Put corner protectors on coffee tables, low shelves, and hearth edges. You should be able to run a hand along the corner without feeling a hard point.
- Manage cords and outlets. Add cord covers and outlet covers. The room should look neater, with fewer visible loops and no open sockets.
- Simplify what sits within reach. Move breakables, remotes, and small decor above reach or into closed storage.
- Add toy storage last. Once the hazards are controlled, choose one basket, bin, or cabinet so the floor does not become the storage system.
A generic checklist can treat every room the same, so it helps to consult a childproofing professional and verify guidance from the Consumer Product Safety Commission. That misses the living room’s two biggest challenges: it has a lot of furniture that looks stable until it is pulled, and it often has a TV, fireplace, or media cords all in one place. The right fix is not more gear; it is the right gear in the right order.
How do you babyproof the living room without making it look cluttered?

You babyproof a living room without clutter by choosing low-visibility hardware, using furniture you already own as storage, and avoiding bulky add-ons that sit in the middle of the room. The goal is to make safety part of the layout, not a layer on top of it.
Think in terms of visual weight. A thick foam bumper around every table edge looks obvious. A slim clear corner guard on a glass table edge is less noticeable, though it may still be visible on close inspection. A fabric bin in a matching color reads as storage; a stack of loose toys in three plastic tubs reads as clutter.
A good rule is to make each safety item serve a second purpose whenever possible:
- A closed ottoman can hold toys while also acting as a soft edge in the room.
- A media cabinet with doors hides remotes, cords, and small electronics.
- A basket under a console can hold soft toys without turning the floor into a play zone.
- A mounted TV removes the need for a bulky stand in some rooms, though it still needs proper anchoring if the stand remains.
If you want the room to stay calm visually, avoid buying five different styles of protector. Pick one finish for visible pieces when you can. Clear, white, or wood-tone items usually blend better than bright colors made for temporary use. That is not a safety issue, but it matters in a room you look at all day.
The trade-off is that low-profile solutions can be slightly less forgiving if installed badly. A clear corner guard placed crooked still looks crooked. A cord cover mounted at the wrong height will draw the eye more than the cord itself. Take the extra five minutes to align each piece before pressing it down or tightening screws.
This is also where restraint matters. A room that feels overprotected can be just as frustrating as one that is underprotected. If you have a secure fireplace gate, anchored furniture, and hidden cords, you may not need to cover every baseboard and edge in sight, but a childproofing professional can help confirm the right balance for your room.
Anchor the TV and furniture so the room stays calm and stable
Anchor the TV and any tip-prone furniture before you add decorative fixes. This is the one step that protects against the most serious household hazard in a living room, because a child does not need to climb very high to create a tipping risk.
Use tv straps on a television that sits on a stand, and use furniture anchors on bookcases, dressers, shelving units, and tall cabinets. If the piece is tall, narrow, top-heavy, or holds heavy objects on high shelves, it belongs on the anchor list. A low, wide console may still need securing if drawers can be pulled open and used as a step.
Do the installation one piece at a time:
- Choose the anchor points. Find wall studs for the wall side and the manufacturer-recommended points on the furniture side. If the item came with hardware, use the supplied screws unless the instructions specify otherwise.
- Position the item where it will live. Push the TV stand or bookcase into its final place first. Moving it later can loosen the anchor.
- Attach the straps or anchors. Tighten them so the item does not wobble when you tug the top edge. When it is right, the piece should still look aligned with the wall and not lean forward.
- Hide the excess length. Tuck the extra strap behind the furniture or along the back edge so it does not hang in view.
- Test the result. Pull gently at the top and side. A secured piece should resist tipping and stay visually square to the wall, but a childproofing professional can confirm the installation if the wall or furniture is unusual.
The honest drawback is that anchors can leave small holes if you move furniture later. That is still a better trade than leaving a tall piece unsecured. Another limitation: straps only work if they are installed into solid anchoring points, not drywall alone. If the wall is unusual, damaged, or brick, use the correct hardware for that surface or have a pro handle it.
For TV anchoring guidance, the Consumer Product Safety Commission has a dedicated page on furniture and TV safety, and the Juvenile Products Manufacturers Association explains safety-minded product selection standards for juvenile gear. The standards context matters because this is one area where a cheap shortcut looks harmless until a child pulls.
Hide cords and outlets without turning the room into a tangle
Hide cords and cover outlets by routing cables along furniture edges, bundling slack near the source, and using cord covers where a cord must cross open floor or wall space. This keeps the room cleaner and removes the looped, dangling shapes that invite grabbing.
The cleanest cord setup starts behind the media unit. Unplug everything, then sort cords by destination: TV power, streaming box, game console, lamp, speaker, charger. Shorten the visible path for each one before you buy anything. If a lamp cord is six feet long and you only need three, a childproofing professional can advise on the safest way to manage the extra length, and you can coil the extra length behind the cabinet and secure it out of reach. If the cord must travel across an exposed area, use a low-profile cord cover that matches the floor as closely as possible.
Do this in order:
- Trace each cord from device to outlet. You cannot hide what you have not mapped.
- Shorten slack at the back of the furniture. Secure the extra length with ties or clips so no loop hangs down.
- Run cords along the least visible route. Back edges, wall base, or behind furniture are better than open floor space.
- Add cord covers where needed. Use them only where a cord is exposed and reachable.
- Install outlet covers. A babyproof outlet cover should sit flush and prevent finger access to the socket.
If the living room uses a power strip, place it inside a closed cabinet or behind furniture where the baby cannot reach the switches or plugs. Do not leave a strip on the floor under a sofa where cords can be yanked loose. That is one of the easiest places for clutter to hide while still being dangerous.
A common mistake is trying to solve every cord with one giant raceway or a pile of cable clips. That often makes the wall look busier, not cleaner. Use the smallest system that solves the actual path. One short cord cover on a visible stretch is better than running plastic trim around the entire room.
For outlet safety, the National Fire Protection Association has general electrical safety guidance, and many product labels explain whether a cover is a plug-in style or a screw-on plate replacement. The exact style matters because a cover that falls out is not a real fix.
What should I babyproof around the fireplace and sharp edges?
You should babyproof the fireplace with a secure gate and protect low, hard edges with corner guards or moved furniture placement. The fireplace is one of the few living-room features that needs a dedicated barrier rather than just a softening accessory.
If you have an active fireplace, treat the opening, surround, and hearth as separate hazards. The opening needs blocking. The hearth edge needs padding or clearance. The tools and accessories need to move away from reach. If the fireplace is decorative or unused, it still counts as a hard, often raised surface that can bruise a forehead or cheek.
A fireplace gate is the cleanest solution because it creates a visible boundary without filling the room with extra pieces. Choose a gate that mounts securely or stands with enough width to stay in place. When it works, the baby can play nearby without reaching the hot or hard surface, and the gate reads as a purposeful part of the room rather than clutter.
For sharp edges elsewhere, focus on the furniture the baby is most likely to contact: coffee tables, side tables, low media cabinets, and any stone or wood ledge at crawling height. Corner protectors are useful when the edge is unavoidable, but they are not magic. On a very hard surface, the protector softens the hit; it does not remove the risk of impact entirely. That is why moving the table out of the main play path is often cleaner and safer than covering it in foam.
Choose the least visible fix first:
- Move the table or ottoman out of the path of play.
- Round the room layout by creating a clear crawl lane.
- Use corner protectors only on the remaining unavoidable edges.
- Keep matches, lighters, and fireplace tools out of sight and out of reach.
The trade-off is obvious: a gate can be more visible than a small protector strip. But at a fireplace, visibility is not the problem. A child needs to see the barrier clearly. That is one place where blending in matters less than setting a firm boundary.
Use toy storage that keeps the floor clear
Use closed, easy-to-open toy storage so the floor stays open and the room still looks intentional. A single basket, cabinet, or ottoman usually works better than several small bins scattered around the living room.
The best toy storage for a living room is the kind that does not look temporary. A lidded basket, storage ottoman, or low cabinet can hold soft toys, board books, and teethers without adding visual noise. If the storage piece sits near the sofa or media console, it should match the room’s scale. One container that is 18 to 24 inches wide often looks calmer than three small bins spread across the floor.
Sort what belongs in the room into three groups:
- Daily toys: one small rotation the baby uses often.
- Occasional toys: items you bring out and put away each day.
- Do-not-store-here items: noisy toys, tiny parts, and anything that becomes clutter instantly.
When the container is working, you can clear the living room in under 2 minutes and the floor returns to a usable state. If you need a 10-minute cleanup every time, the system is too fragmented.
A good toy storage system also helps with safety. Small toys left in reach become choking hazards for younger siblings and make the floor harder to scan. Closed storage keeps the room from becoming a catch-all for pacifiers, cords, remotes, and random household items.
One limitation: open baskets are attractive and easy, but they are not ideal if the baby likes to empty everything onto the floor. In that case, a lidded bin or closed cabinet is a better choice. The room will look less cluttered, and you will spend less time picking up the same items.
This is the section many generic articles miss. They explain how to block danger, then leave the room looking like a hardware aisle. Good living-room babyproofing includes where the toys go when the room is done.
What to skip if you want the room to stay tidy
Skip bulky foam kits, overusing adhesive gadgets, and buying every protector before you know which hazards the baby can actually reach. Those are the quickest ways to make a carefully arranged room look busy and improvised.
The first thing to skip is unnecessary duplication. If a tall bookcase is anchored to the wall, you do not also need a decorative strap across the front. If a cord is already hidden behind a cabinet and out of reach, you do not need a second cover over the same section. Each added item increases visual noise and makes cleaning harder.
The second thing to skip is solving the wrong problem. A stack of corner guards on furniture that lives outside the play zone wastes time and money. A cord cover on a cable already tucked behind a console does nothing except add more hardware to the wall. Focus on the baby’s actual reach, not on every object in the room.
The third thing to skip is temporary storage that stays forever. A laundry basket full of toys, a box of spare cables, and a pile of blankets in the corner all turn a tidy living room into a catch-all. If you want the room to keep its clean look, every storage piece should have a clear job and a clear home.
For a practical inventory, walk the room and look for the items that create the biggest risks first: anything that can tip, burn, pinch, or shock. Then decide whether each fix can disappear into the layout. In that order, a living room can be safer, calmer, and still feel like the room you already had.
Drafted with AI; not yet reviewed by a person.